Application Guide
This page describes how to use the main features of the Naturtag desktop application.
Typically there will be three steps:
Note
Currently, the UI is meant for tagging one set of related photos at a time, but batch tagging features are planned for future updates.
Selecting Images
The Photos tab is the main interface for selecting and tagging images:
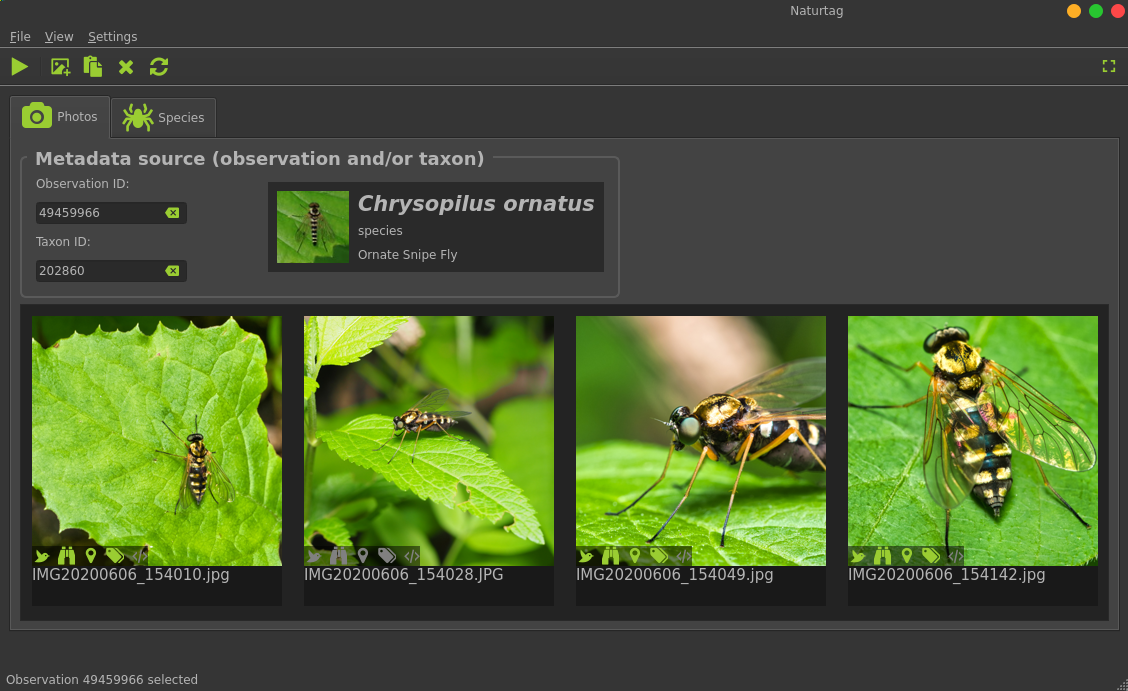
To select images:
Drag & drop images or folders into the window
Select files with the Open button in the toolbar (or
Ctrl+O)
Mouse actions:
Left-click an image for a fullscreen view
Middle-click an image to remove it
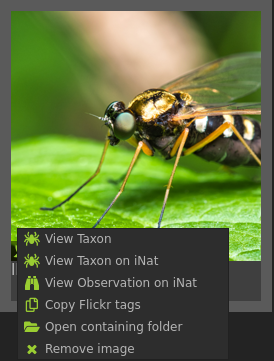
Right-click an image for a context menu with more actions:
Use the button in the toolbar (or Ctrl+Shift+X) to clear all selected images.
Selecting a Metadata Source
Next, you will specify an observation or species to use as a metadata source There are a few ways to do this:
Use the Observation Browser page
Use the Taxonomy Browser page
Paste an iNaturalist URL anywhere (with
Ctrl+Vor the Paste button from the toolbar)Enter an iNaturalist observation ID or taxon ID
Tagging Images
Once you have selected images and a metadata source, click the Run button in the toolbar
(or Ctrl+R) to generate and save image metadata.
Refreshing Metadata
In many cases, you might upload an observation with only a rough identification (order, family,
etc.), and later get a more specific (or corrected) ID on iNaturalist. In these cases, you can use
the Refresh button in the toolbar (or F5) to quickly update all of your selected images
that have been previously tagged. When using Refresh, you can select images for multiple
observations and taxa.
Refresh has the following behavior depending on the metadata source:
For observations, this will update your image metadata with the latest observation details from iNaturalist, and fill in any additional missing information.
For taxa, this will update your image metadata with any missing taxonomy information (for example if an image has been tagged with only a taxon ID)
Note
If you would like to use a different tool to add taxon IDs to your photos, and then use Naturtag to fill in the rest of the details, you can add it as an EXIF or XMP keyword in the format:
taxon_id:12345
Taxonomy Browser
The Taxonomy tab contains tools to search and browse species to tag your images with:
This can be used to search for any taxonomic rank (genus, family, etc.), not just species. Elsewhere in the docs these will be referred to as taxa (singular: taxon).
Once you’ve found the taxon you want, press the Select button to select it as a metadata source.
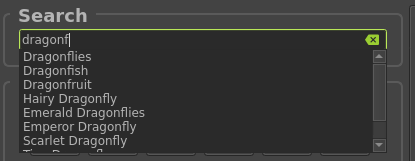
Basic Search
You can start by searching by name, with autocompletion:
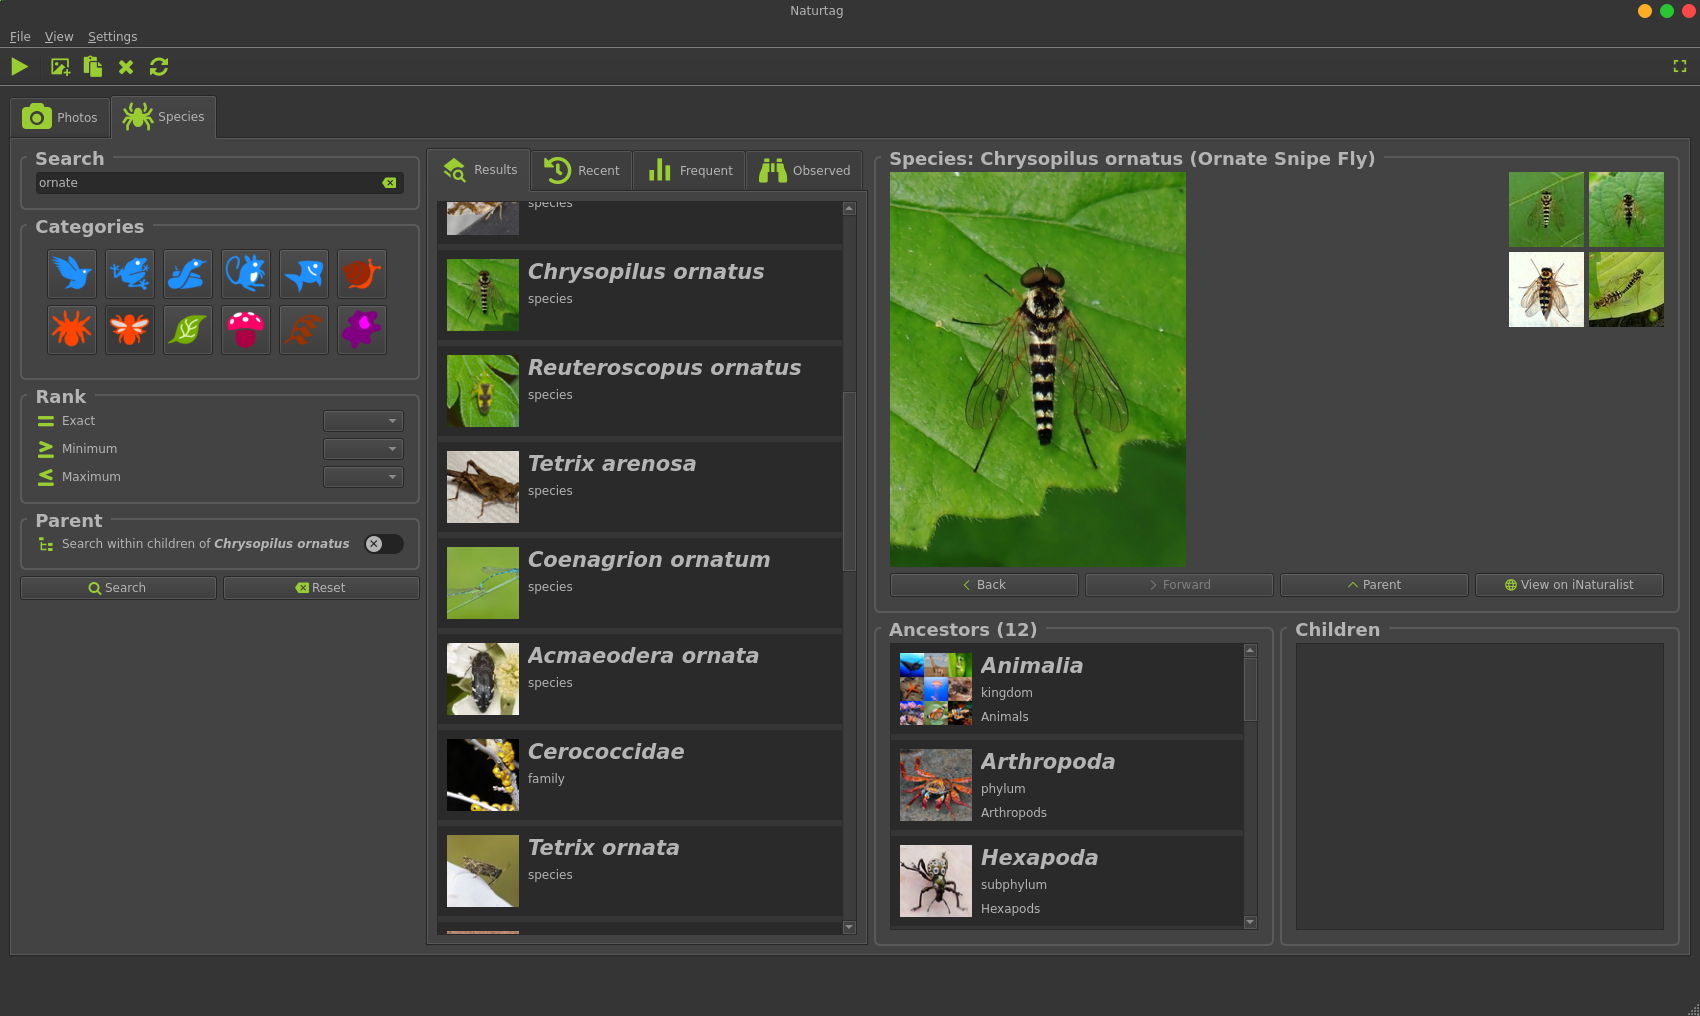
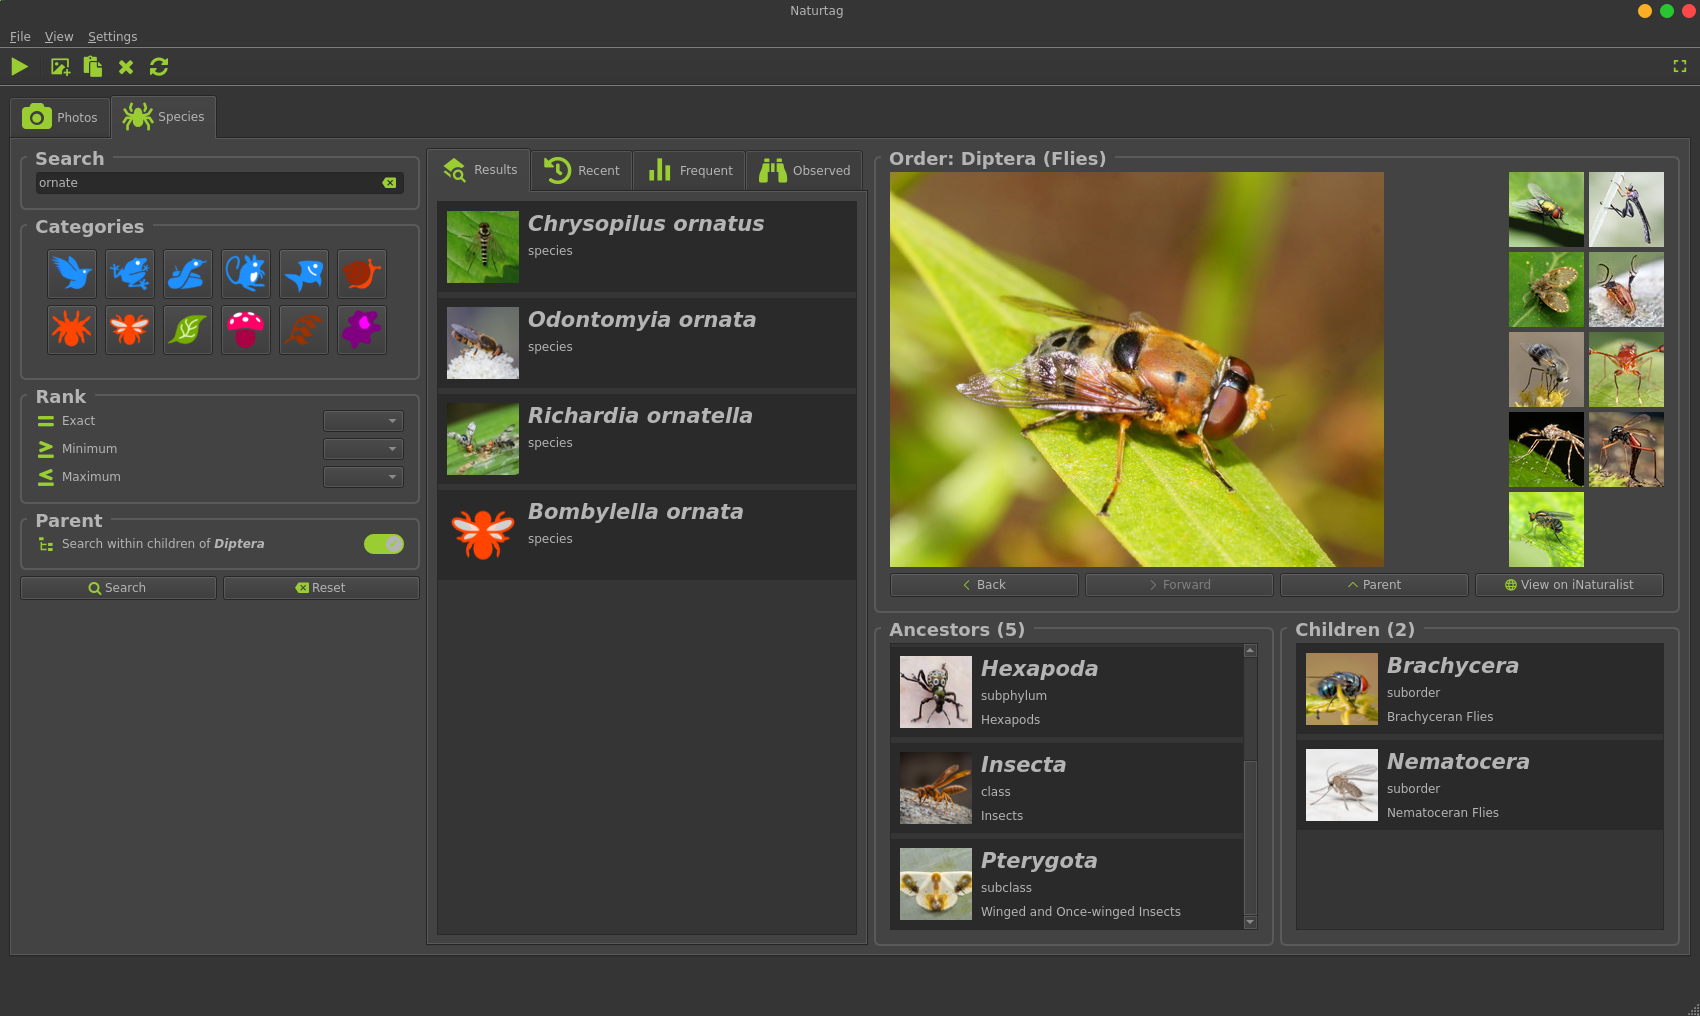
Full Search
Or you can also run a full search using additional filters:
Categories filters by iconic taxa (Birds, Amphibians, etc.).
Ctrl-clickto select multiple.Rank filters by taxonomic rank (Family, Genus, Species, etc.).
Select an exact rank, for example to search only for species
Or select a minimum and/or maximum rank, for example to search for anything between a species and a family.
Parent uses the selected taxon as a filter, and searches within children of that taxon.
For example, a search for flies (Diptera) with ‘ornate’ in the name will look like this:
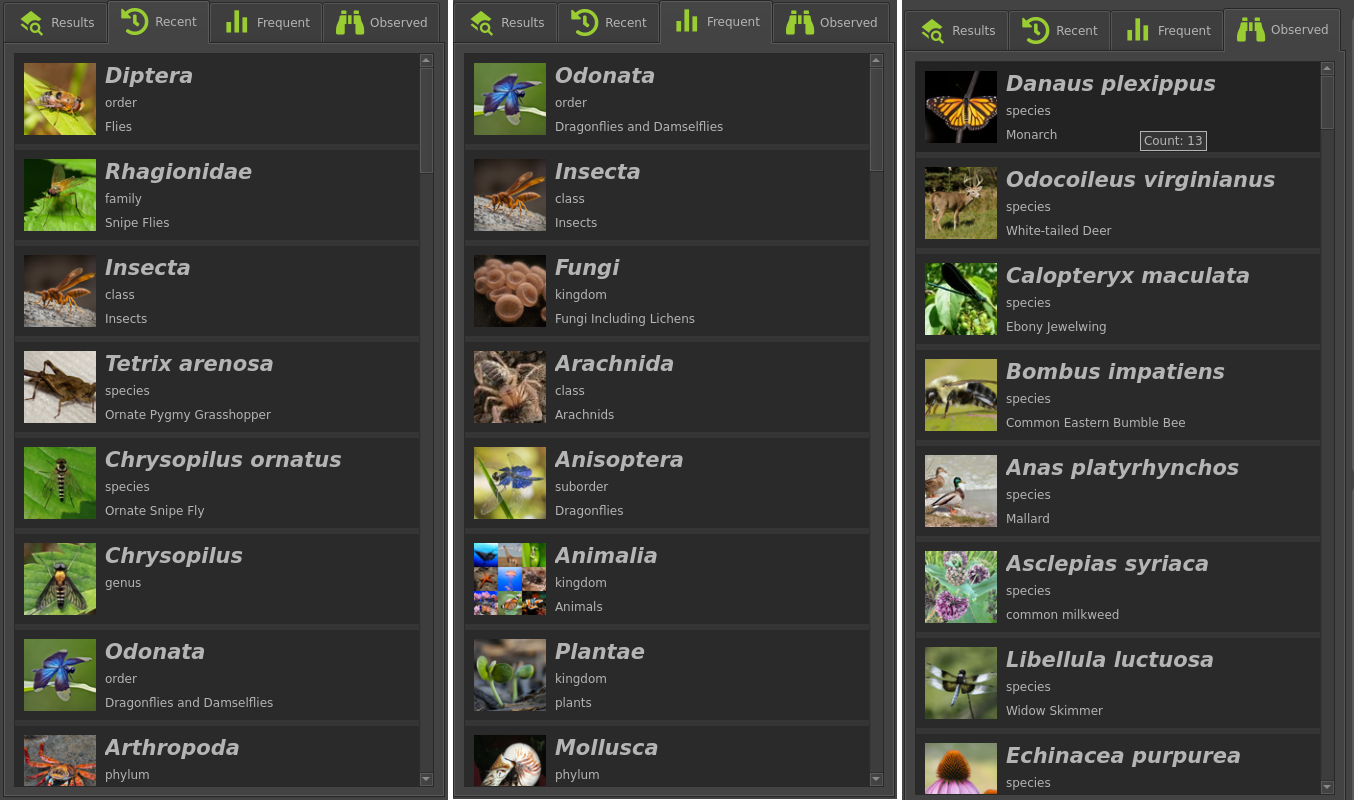
Taxon Lists
The additional tabs next to search results contain:
Recent: Recently viewed taxa
Frequent: Most frequently viewed taxa
Observed: Taxa observed by you, sorted by observation count
Observation Browser
The Observations tab displays your recent observations that you can to tag your images with:
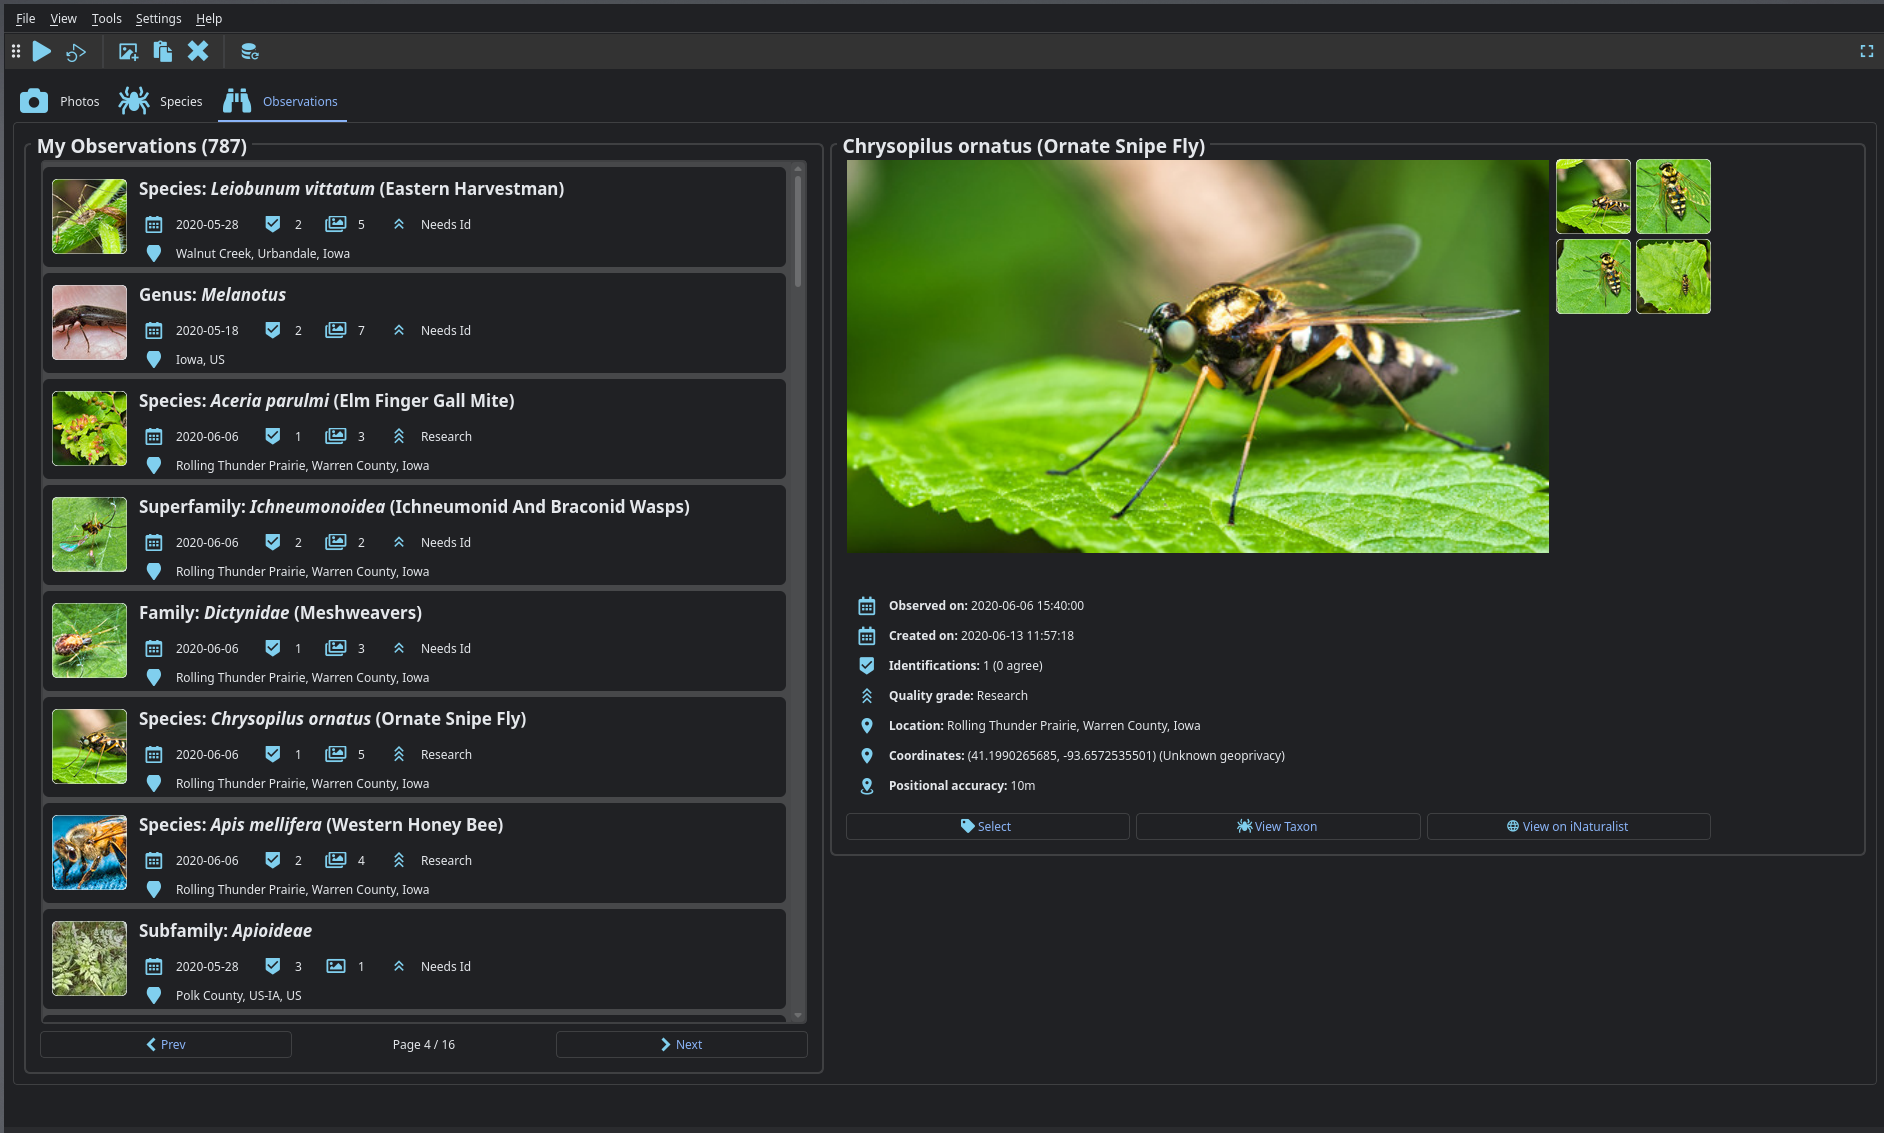
The list of observations will update every time you launch Naturtag. To manually refresh, press F5 or click the Refresh icon in the toolbar.
Once you’ve found the observation you want, press the Select button to select it as a metadata source.
Photo Viewer
You can click any of the observation photos to open the photo viewer in a fullscreen window. You can use the Left and Right arrow keys to navigate, and the Escape key to exit.
Settings
See the Settings menu for some settings to customize the metadata that your images will be tagged with, iNaturalist info used in search filters, and other behavior:
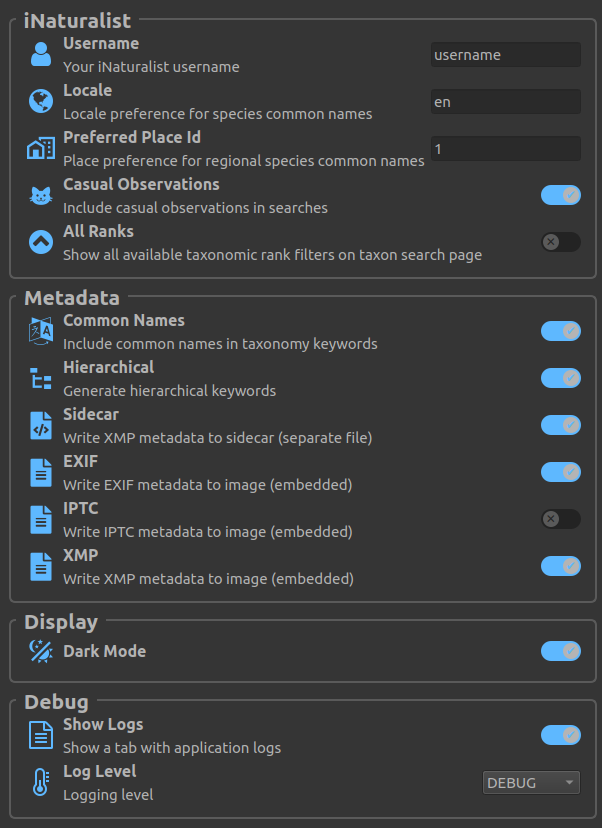
Note
The settings in the Metadata section also apply to the CLI.
Image Directories
Under the File menu, there are submenus with shortcuts to commonly used image directories:
Open Recent Will show the most recently used directories
Open Favorites Will show the directories you have marked as favorites
Adding and removing favorites
To add a directory to favorites select Add a favorite from the favorites submenu. You can also Ctrl-click a directory from the recent submenu.
To remove a directory from favorites, Ctrl-click the directory from the favorites submenu.
Keyboard Shortcuts
Some keyboard shortcuts are included for convenience. These are listed below, along with the tab or screen they primarily apply to:
Key(s) |
Action |
Tab/Screen |
|---|---|---|
|
Open file browser |
Photos |
|
Paste photos or iNat URLs |
Photos |
|
Run image tagger |
Photos |
|
Run image tag refresh |
Photos |
|
Clear selected images |
Photos |
|
Run search |
Species |
|
Clear search fields |
Species |
|
View previous taxon |
Species |
|
View next taxon |
Species |
|
View parent taxon |
Species |
|
Refresh observations |
Observations |
|
View previous page |
Observations |
|
View next page |
Observations |
|
View previous image |
Fullscreen image (local photo or taxon) |
|
View next image |
Fullscreen image (local photo or taxon) |
|
Exit fullscreen view |
Fullscreen image (local photo or taxon) |
|
Remove image from selection |
Fullscreen image (local photo) |
|
Cycle through tabs |
All |
|
Add a directory to favorites |
All |
|
Toggle toolbar visibility |
All |
|
Toggle fullscreen |
All |
|
Quit |
All |